

Hierarchy
Nest the terms of an attribute, for example sizes by age group or colors by family.
Turn on the Hierarchy
- Open AttribPress › Settings.
- Check Enable term hierarchy for all attributes. The list of attributes it applies to is shown below.
- Click Save Changes.
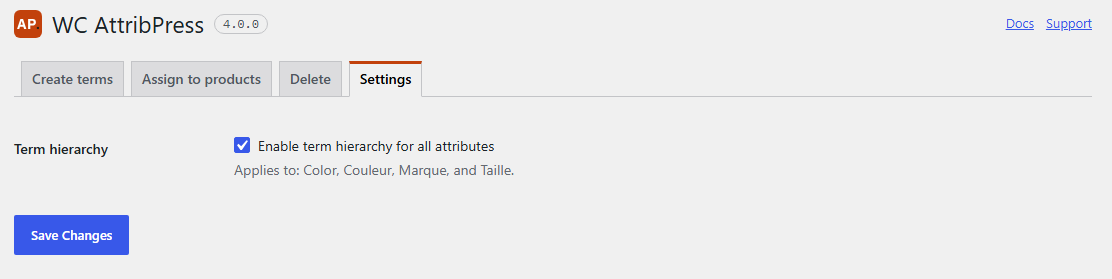
The setting applies to every attribute. Once it is on, WordPress shows a Parent field when you edit a term, and the term lists show the tree.
Write paths with >
In Create terms and Assign to products, write a path from the top level down, with > between levels:
Kids > 4Y
Kids > 6Y
Adults > S
Adults > M
Blue > Navy blue
Blue > Sky blue- Paths can have any depth:
Women > Tops > S. - Missing parents are created for you, once, before their children. You don’t need a separate line for “Kids”.
- The same name can live under two parents:
Kids > SandAdults > Sare two different terms. - An empty level, such as
Kids >or> 4Y, makes the line invalid.
If the Hierarchy is off, lines with > are marked Invalid in the preview, with the message “To nest terms with >, turn on Hierarchy in Settings.”
On your shop
The archive page of a parent term, such as “Kids”, also lists the products of its children (“Kids > 4Y”, “Kids > 6Y”). The attribute filter of the shop works differently: filtering on “Kids” lists only the products that have the “Kids” term itself. This is how WooCommerce® handles hierarchical attributes.
Without an active license
The Hierarchy stays displayed on your shop and in WordPress even if your license is not activated yet. Only the tools need the license.
Turning it off
Unchecking the setting does not delete anything. Your terms keep their parents in the database; WordPress simply stops showing the tree. Turn it on again and the tree is back.